


Making your own Gnocchi is simple and fun!
Grab your apron and let us show you how to make this traditional Italian side dish
No need to be intimidated by making homemade gnocchi because it's really quite easy, especially when you follow our basic step-by-step instructions
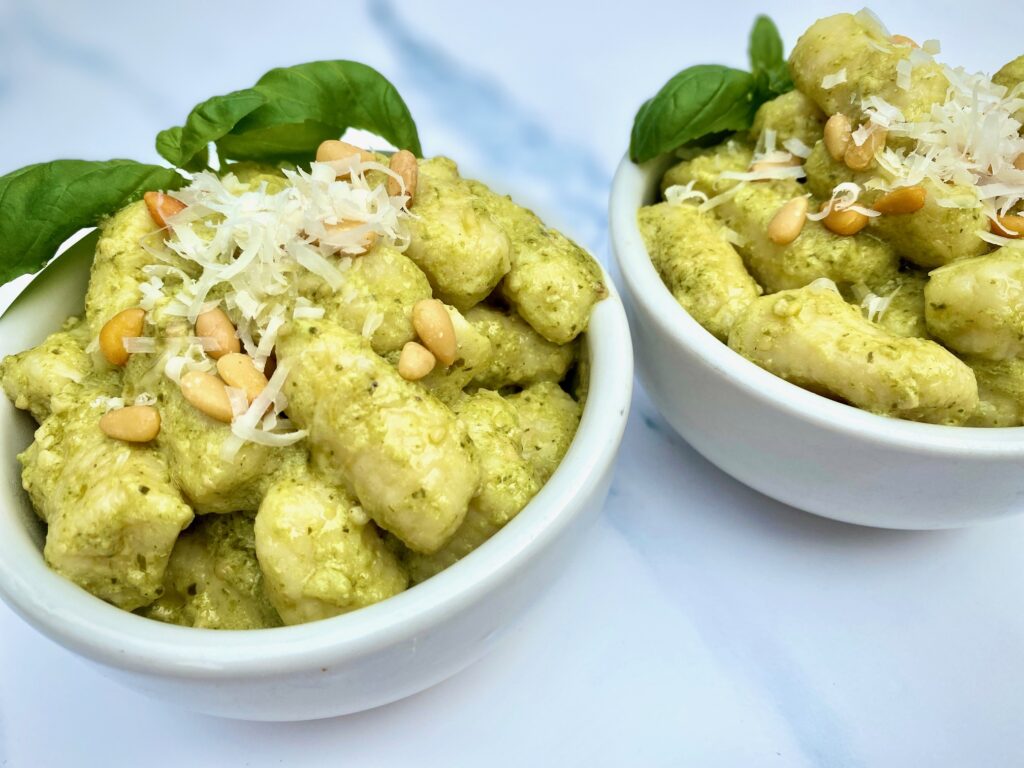
Once made it becomes a culinary staple that works with almost every sauce including our Homemade Pesto to make one pan Pesto Gnocchi or with a hearty ragu like our classic Bolognese Sauce
Jump to RecipeThis post may contain affiliate links. Please see our affiliate disclosure for more details.

What is Gnocchi?
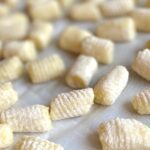
Gnocchi (pronounced NYO-kee) is not pasta but rather a potato dumpling.
It's actually a small Italian dumpling made with cooked mashed potatoes, flour, eggs (and sometimes cheese). The dough is formed into little solid dumpling pieces and often shaped with a gnocchi board to give it its signature ridges. The ridges are ideal for capturing sauce!
Ingredients needed to make Gnocchi
You only need 4 basic ingredients to make gnocchi
- Russet Potatoes - you must use floury potatoes (see below for more information regarding the best potatoes to use)
- Flour - basic all-purpose
- Salt - we use fine sea salt
- Egg

How to make gnocchi from scratch
There are 4 basic steps involved in making perfect gnocchi, but they are all easy.
First Step - Baking the Potatoes
- Preheat the oven to 425° F.
- Scrub potatoes, pat dry, and pierce with a fork several times around each potato
- Line a baking sheet with parchment paper or foil
- Add pierced potatoes to the prepared baking sheet
- Cook potatoes for about 1 hour, or until tender, and they can be easily pierced with a sharp knife tip
- Remove from the baking sheet, cut in half, and let cool slightly
- Once mostly cool, peel the potatoes
- Shred with a large grater or pass thru a potato ricer onto a clean sheet pan


Second Step - Preparing the Dough
- Add flour and salt in a mound to a work surface. Mix a little to combine them but leave in a mound
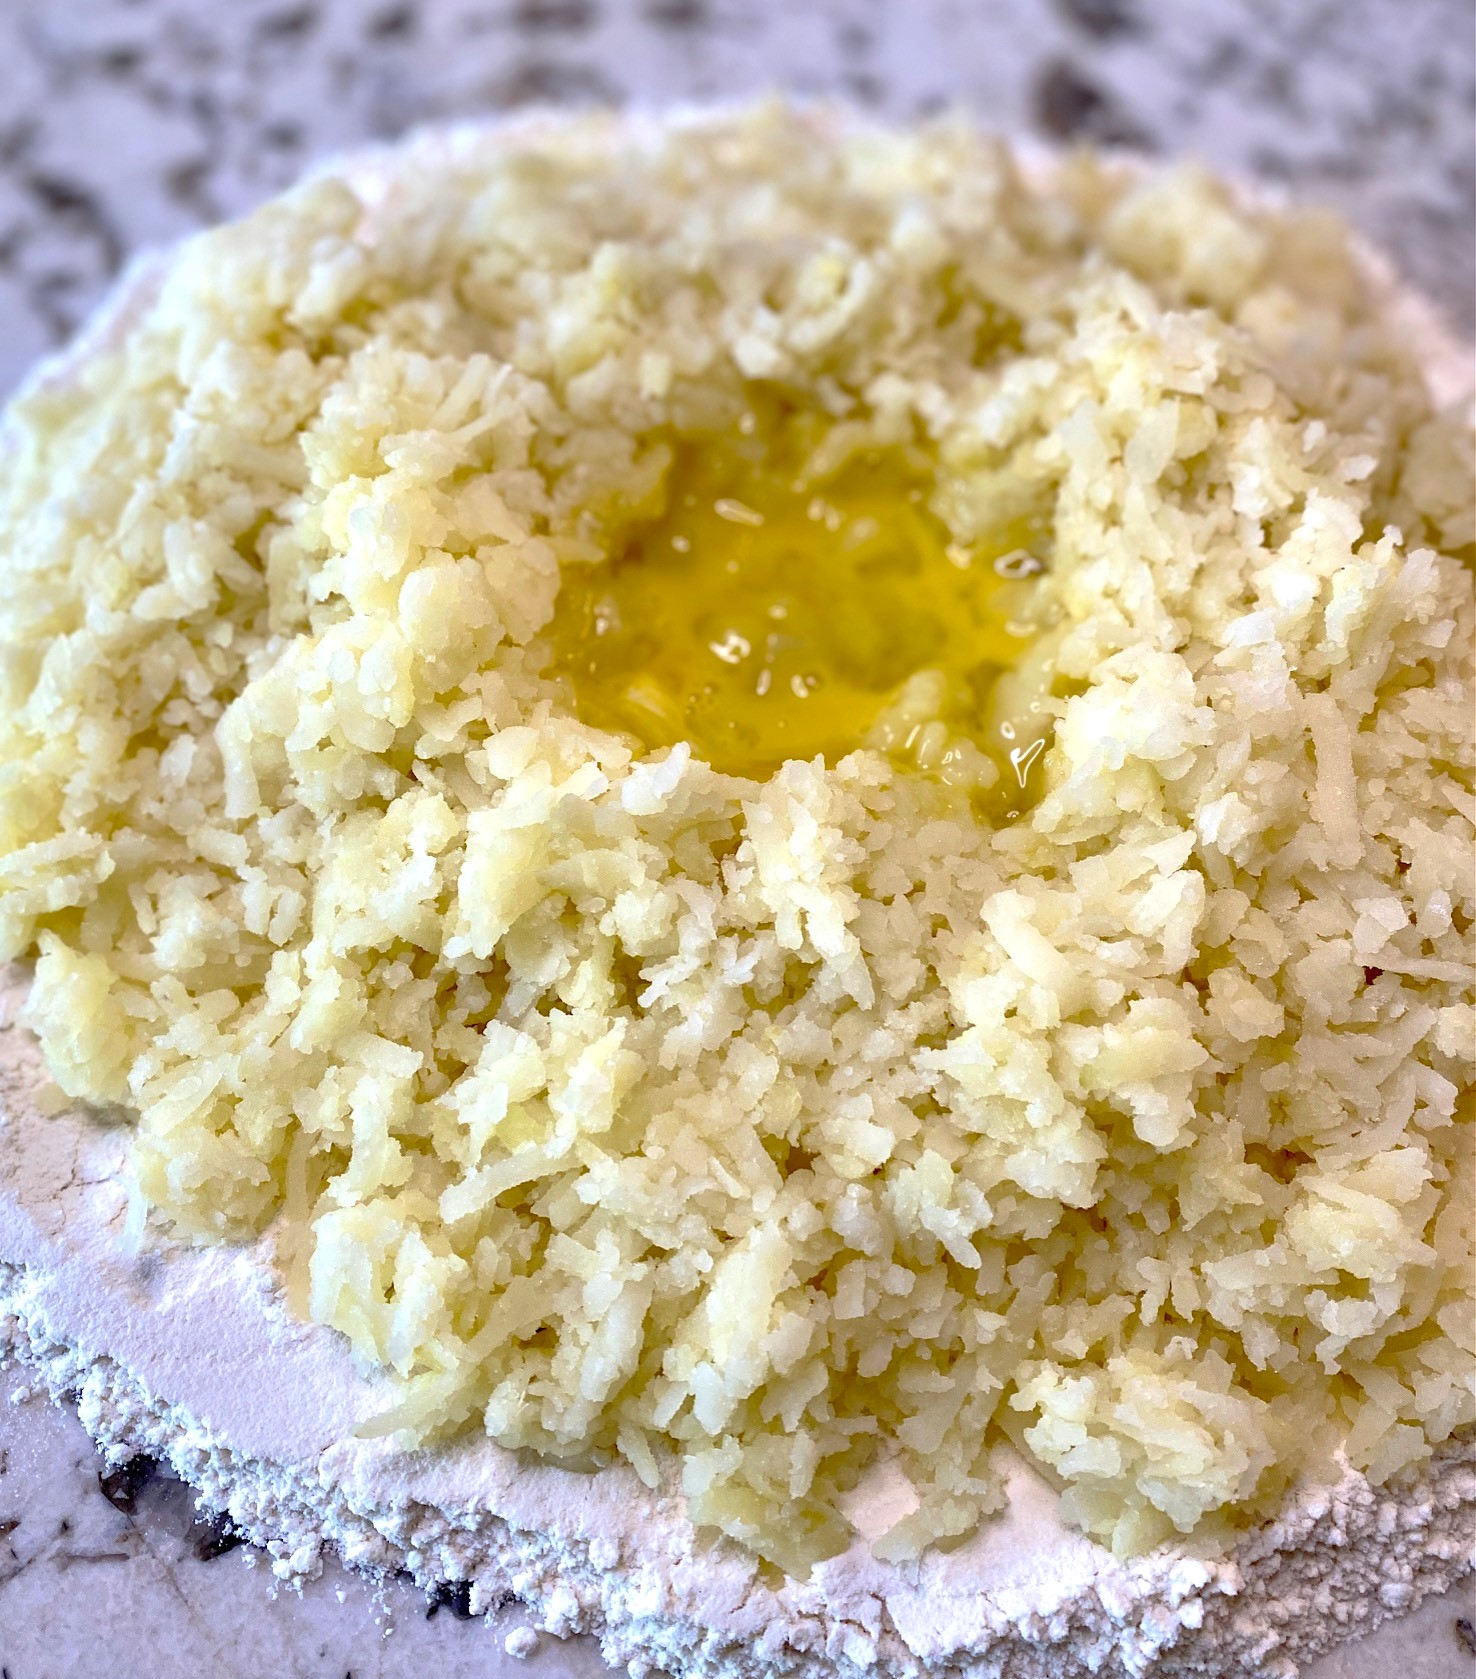
- Place shredded potatoes on top of the mound of flour
- Whisk the egg and add on top of the potatoes (picture 1 below)
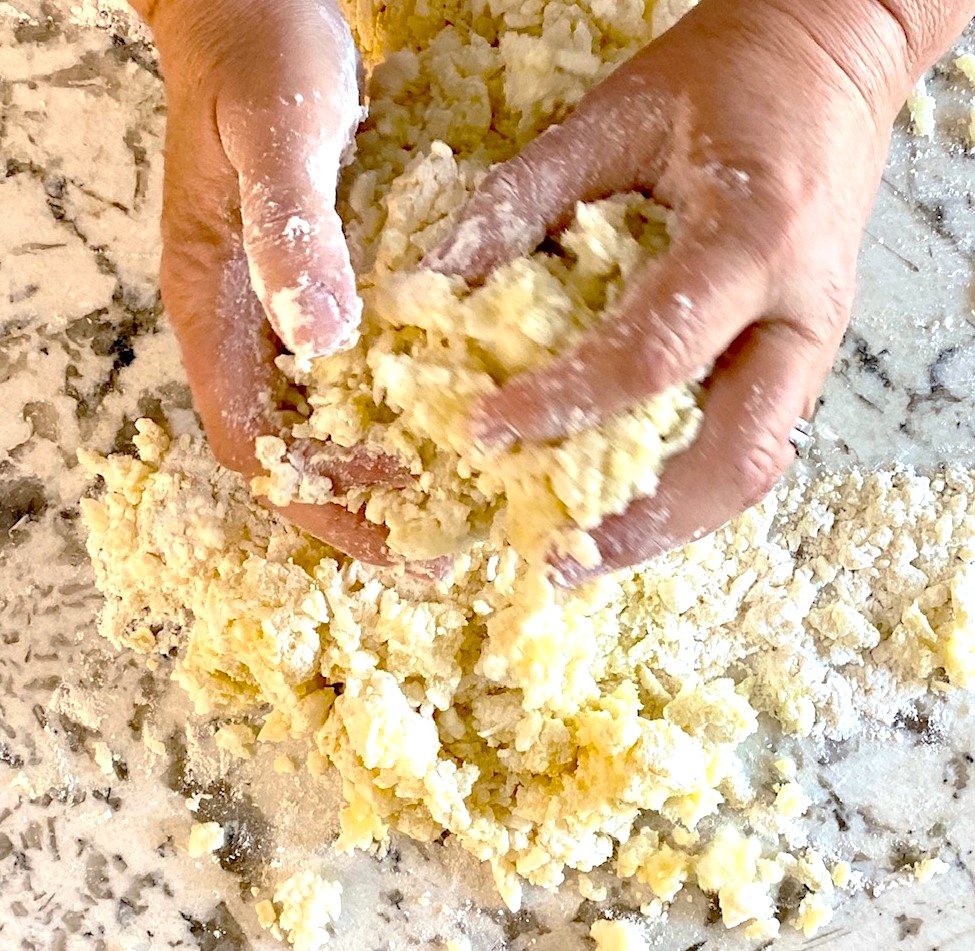
- Begin mixing with your hands to combine everything. The dough should begin to clump together but will still be somewhat crumbly (picture 2 below)
- Keep gathering the dough together and pressing down to knead with the heel of your hand (picture 3 below)
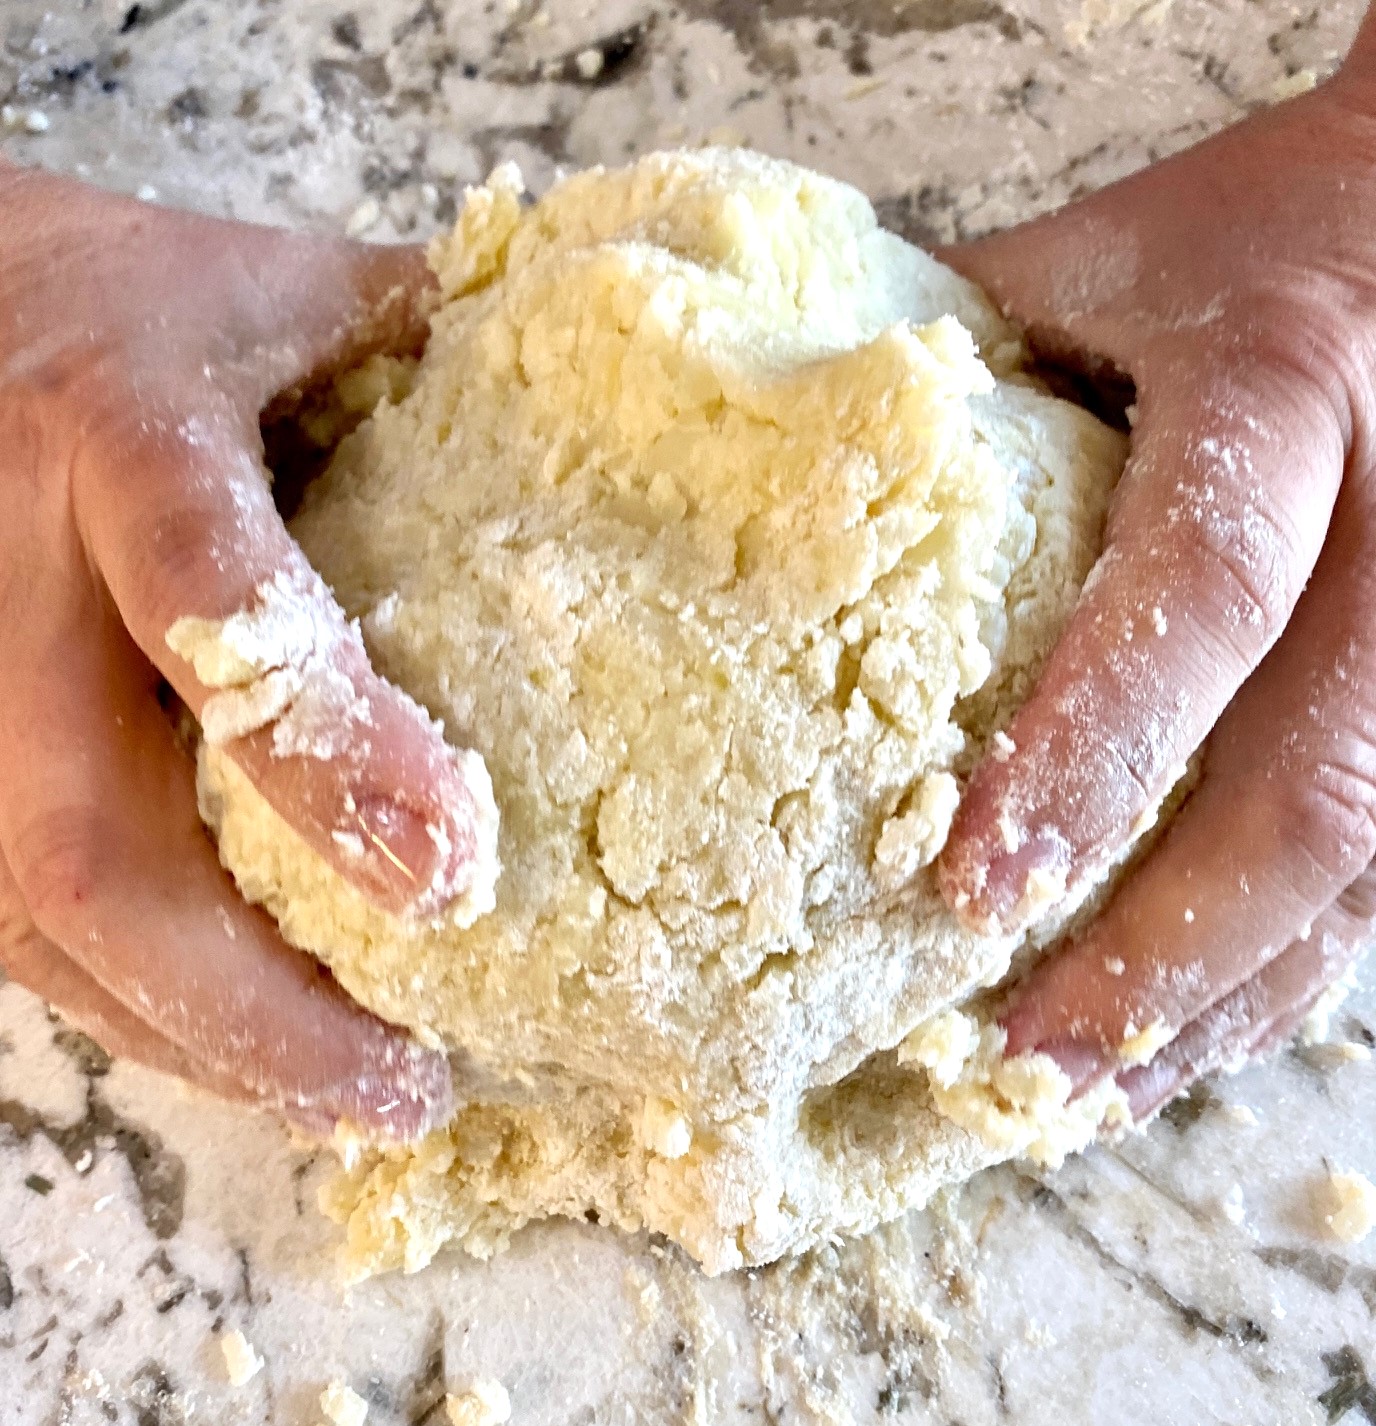
- Once you have a uniform mass begin kneading the dough until the flour is fully incorporated and the dough is smooth, soft, and slightly sticky. This will only take about one minute. Do not overwork the dough (picture 4 below)
- Set the dough aside and cover it with a clean kitchen cloth to keep it from drying out

Third Step - Cutting the Gnocchi
- Scrape the work surface clean and sprinkle a little fresh flour on the work surface
- Line 2 baking sheets with parchment paper and sprinkle with flour. If you don't have parchment just sprinkle the sheet pan liberally with flour to prevent sticking
- Cut dough into strips. (photo 1 below) Keep remaining dough covered so that it doesn't dry out
- On the floured surface, roll the dough piece into a log about 1-inch in diameter (picture 2 below)
- Cut the log with a sharp knife into 1-inch pieces. They should be small squares (picture 3 below)


Fourth Step - Shaping the Gnocchi
- You can now cook the gnocchi as they are, or shape them, using a fork or gnocchi board. A gnocchi board makes it really quick and easy and they are very affordable.
- Ridged gnocchi are preferred because the ridges help hold all the delicious sauce in place later
- To use the gnocchi board: Flour it lightly. Place a piece of dough on the board and then roll the dough over the board, pushing away from you, and pressing with your fingers (see photos below)
- If using a fork to shape: use the same basic method as above to create the ridges
- Repeat with all the dough and place the finished pieces on the prepared baking sheet


How to Cook Gnocchi
- Bring a large pot of salted water to a boil
- Add the gnocchi to the water. When they begin to float, they are done!
- Gnocchi cooks quickly so keep a close eye on them and remove the floating gnocchi with a slotted spoon
- You can now add them straight into any sauce
- If not using immediately keep them covered in a warm pan until ready to serve

Freezing and Refrigerating:
- Arrange the pieces in a single layer on a baking sheet and place it in a level position in the freezer. Freeze until solid (about 3 hours). Gather the frozen gnocchi and place them in a resealable bag or container
- Once frozen the gnocchi can be stored for up to 2 months
- Gnocchi can be cooked directly from the freezer. No need to thaw them
- Only freeze uncooked gnocchi. This helps preserve the gnocchi's texture and shape. Do not freeze cooked gnocchi
- Fresh uncooked gnocchi can be stored in the refrigerator for up to 2 days, tightly sealed
- Cooked gnocchi can be stored in refrigerator for up to 3 days
Pro Tips
- You must use floury potatoes, such as the Russet (recommended) or Idaho variety
- Don't over-knead the dough. Over-kneaded dough can result in tough or gummy gnocchi
- Don't peel the potatoes before baking
- Slightly warm potatoes are easier to grate or put through the ricer
Best potatoes for making Gnocchi:
Potatoes are divided into 3 basic categories depending on the level of starch content. For Gnocchi, you will always use floury potatoes.
- Floury or Starchy - These potatoes break down quickly during cooking due to their high starch content which makes them ideal for fritters, mashed potatoes, gnocchi, french fries, and dumplings. They are also super absorbent which allows them to soak up all the added flavors. The classic examples are Russets (which we use in our Hasselback Potatoes recipe), Idaho, and red potatoes. We prefer Russets for the best and most consistent results.
- Waxy - Low in starch and high in moisture, these potatoes have creamy firm flesh and thinner skin. They hold their shape after cooking which makes them perfect for Roasted Potatoes. They are also great in stews, gratins, and casseroles. Examples are Red Bliss, baby potatoes, fingerlings, creamers, and new potatoes.
- All-Purpose - These potatoes have medium starch and medium moisture content. The most popular are Yukon Golds, white potatoes, and purple potatoes. A great middle-of-the-road choice that can be used in mashed potatoes, pan-frying, or in soups and most types of stews.

Want to Save This Recipe?
Enter your email & We'll send it to your inbox. Plus, get great new recipes from us every week!
By submitting this form, you consent to receive emails from The Art of Food and Wine.
How To Make Gnocchi
Equipment
- gnocchi board, optional
Ingredients
- 2 pounds Russet Potatoes (about 4 medium)
- 1 ¼ cups Flour
- 1 Tablespoon salt
- 1 medium egg, whisked
Instructions
STEP ONE: Baking the potatoes
- Preheat the oven to 425° F. Line a baking sheet with parchment or foil.
- Scrub potatoes, pierce with a fork several times on each potato, pat dry and place on top of the salt layer on the baking sheet.
- Cook potatoes for about 1 hour, or until tender, and easily pierced with a sharp knife tip. Remove from baking sheet, cut in half, and let cool slightly.
- Peel cooled potatoes.
- Shred on a grater, or use a potato ricer, to shred the potatoes onto a clean sheet pan.
STEP TWO: Preparing the dough
- Combine flour and salt in a mound on a clean work surface.
- Add shredded potatoes to the mound
- Whisk egg and then add on top of the potatoes
- Begin mixing everything together, using your hands, to combine. The dough should begin to clump together but will still be a little crumbly.
- Keep gathering the dough and pressing down with the heel of your hand until you have a uniform mass. Then knead until the flour is fully incorporated and the dough is smooth, soft, and slightly sticky for about 1-minute. Do not overwork the dough
- Set aside and cover dough with a clean kitchen towel to keep it from drying out.
STEP THREE: Cutting the gnocchi
- Scrape your work surface clean and sprinkle a little flour on it
- Line 2 baking sheets with parchment paper and sprinkle with flour
- Cut the round of dough into about 8 thick strips. remove one strip and keep remaining dough covered.
- Roll the dough into a log or snake about 1-inch in diameter and then cut the log into 1-inch pieces (with a sharp knife). You will now have small squares of dough.
STEP FOUR: Shaping the gnocchi
- The gnocchi can now be used as is or shaped, using a gnocchi board, or fork
- To use a gnocchi board: flour it lightly and place a piece of dough on the board and roll the dough over the board, pushing it away from you, and pressing with your fingersTo use a fork: use the same basic technique as above to create ridges
- Repeat with all the dough and place the finished pieces on the parchment lined baking sheet
Cooking the Gnocchi:
- Bring a large pot of salted water to a boil. Add the gnocchi to the boiling water to cook.
- When the gnocchi begins to float they are done. Gnocchi cooks quickly so keep a close eye on it and remove them with a slotted spoon.
- Once cooked the gnocchi can be added to any warm sauce. If not using immediately keep them covered in a warm pan until using.
Notes
- Arrange uncooked gnocchi in a single layer on a baking sheet and freeze for about 3 hours. Gather the frozen gnocchi and place them in a resealable bag or container.
- Frozen gnocchi can be stored for up to 2 months
- Gnocchi can be cooked directly from frozen - do not thaw
- Fresh gnocchi can be stored in the refrigerator for up to 2 days, tightly sealed


Sara Welch
I never realized how easy it was to make gnocchi! Enjoyed this for dinner and it was a hit all around the table; great tips!
Patty at Spoonabilities
I definitely must try this recipe. You've made it look so easy -- and delicious!
Ieva
Very informative! We've been making gnocchi for years, but always use some cream cheese/ ricotta in the dough. This recipe is great, as my mum just found out she's lactose intolerant, so this will be a perfect recipe to cook for her! Thanks!
Dionne
I always have a batch of gnocchi in my freezer. So helpful when I need something quick and easy!
Mahy
I would have never thought that making gnocchi is such an enjoyable process! Thank you for such a lovely recipe.
Dannii
You can't beat homemade gnocchi. A great way to use up leftover mashed potatoes too.