


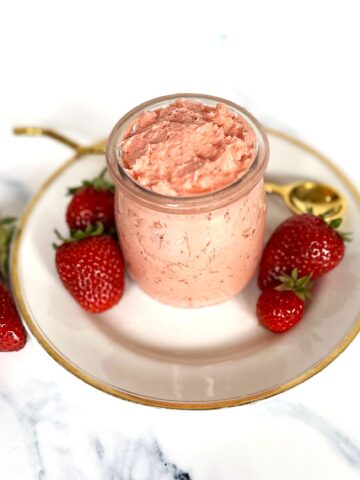
Ricotta Cheese is one of the most versatile and easiest cheeses to make at home. Plus, it's simply delicious!
By following this step by step-by-step to make authentic ricotta cheese you will find it hard to purchase store-bought ricotta cheese again. It's an easy recipe with simple ingredients using a traditional method.
Honestly, we could eat it for breakfast, lunch, and dinner. It's that good!

Ingredients for making fresh Ricotta cheese
There are just a few basic ingredients for making this homemade ricotta cheese recipe.
- Whole Milk - do not use skim milk or nonfat milk
- Heavy Cream - this makes a rich and creamy ricotta, also called heavy whipping cream
- Distilled White Vinegar - plain vinegar is recommended as opposed to apple cider vinegar
- Fresh Lemon Juice - freshly squeezed is best, rather than bottled juice
- Kosher Salt
See the recipe card below for the exact quantities needed

How to make Ricotta Cheese (Step-by-Step)
Ricotta cheese is easy to make in a stock pot with a lid.
Here is the equipment needed:
- Use an enamel Dutch oven, copper pot, or stainless steel stock pot with a lid to get the best results when making your cheese.
- You will also need a skimmer or slotted spoon and fine cheesecloth.
- Instant read or regular thermometer
First Step
- Add the milk and cream to the pot and cook over medium heat until the mixture reaches 200˚F. Stir frequently to avoid sticking or burning at the bottom of the large pot.
- Mix the lemon juice and vinegar in a small bowl and set aside.
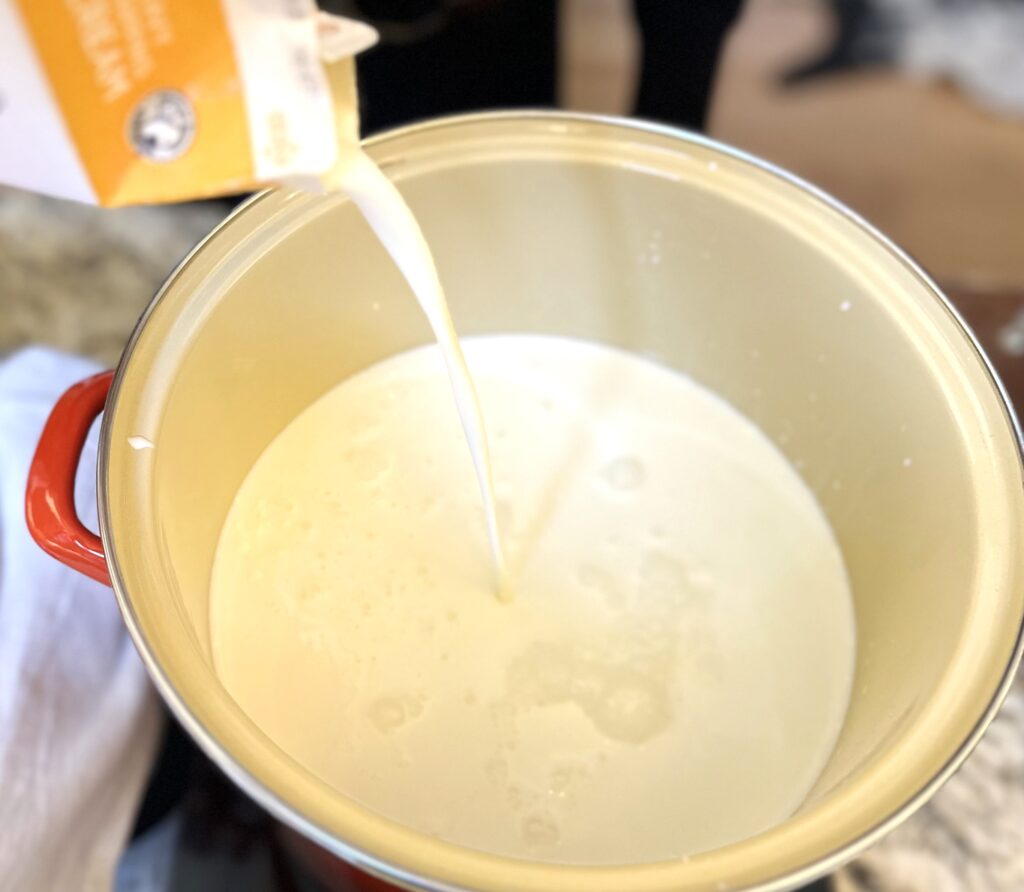

- Once the mixture reaches 200˚F turn off the heat completely.
- Keep stirring constantly while adding in the salt and lemon juice-vinegar mixture.
- Stir 1-2 times to combine. The cream mixture will immediately begin to coagulate. This is normal.
- Cover with the lid.


- Allow the cheese to rest for 10 minutes without removing the lid or stirring. This is important so DO NOT BE CURIOUS.
- While the mixture rests it will continue to coagulate and white curds will form and float on the surface.
- While waiting for the cheese to finish line a colander with a fine cheese cloth, and place the colander into a large bowl. Set to the side of the pot.
Second Step
- After 10 minutes remove the lid from the pot. Gently rest your skimmer on the curds. If the skimmer does not sink all the way below the curds you are ready to scoop out the cheese.

- Scoop from the middle of the pot to the sides of the pot. Lift out the cheese and place it into the cheesecloth-lined colander.

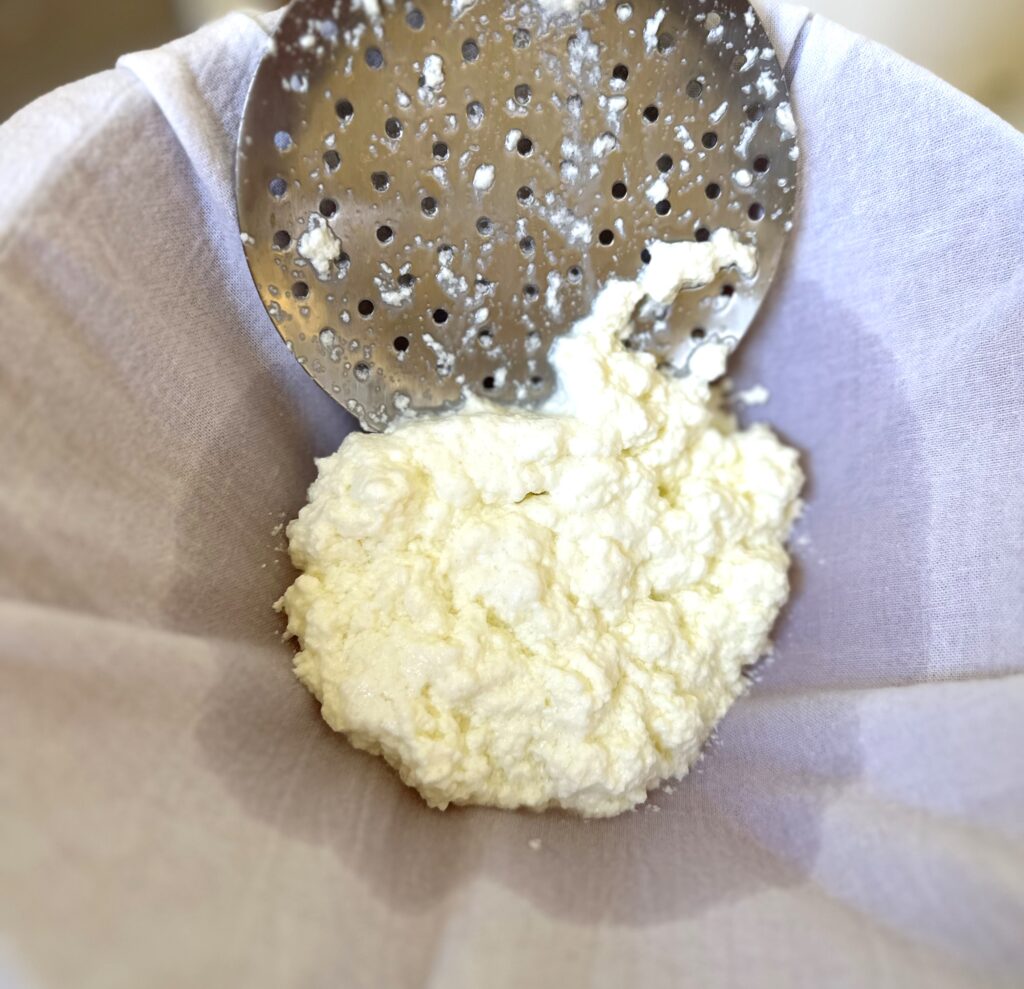
- Scoop out as much of the curds as you can until all that's remaining is a liquid called "whey". (See below for ways to use the leftover whey proteins)
- Allow cheese to drain completely. This will take around 30 minutes.
- Retain any liquid whey that drains from the cheese.
- Remove the cheese from the cheesecloth.


- Cheese can be placed in molds to shape to your favorite shape, or placed in glass jars or an airtight container.
- You can serve the finished cheese on its own or add flavors, spices, or herbs. See below for ideas.
- This recipe makes approximately 2 ½ cups of ricotta cheese
Adding flavors, spices, or herbs to homemade cheese
Here comes the fun part of making your own cheese because you can get bold and creative!
Adding flavors to this cheese is simple. Anything, from a drizzle of honey to olive oils, herbs, vegetables, or fruits works. You can personalize your favorite cheese flavors. Try placing the finished cheese in molds for an added touch.
Here are a few easy examples: These additions make the cheese beyond delicious!
- Lemon Zest - Zest one lemon and then squeeze the fresh juice. Put ½ to ¾ cups ricotta cheese in a small bowl. Drizzle 1 tablespoon of lemon olive oil over the cheese, then add the zest and lemon juice. Add a teaspoon of each at a time until you get the desired flavor. Blend the ingredients thoroughly into the cheese until you have a smooth and creamy cheese.
- Blood Orange Zest - Use the recipe and instructions above but replace the lemon with a blood orange. You can use any variety of orange or citrus.


- Truffle Zest - The principles for making truffle cheese are basically the same as Lemon Zest, however, instead of adding a fruit you will use powdered truffle zest. Start with a bowl of ricotta cheese, then drizzle in truffle olive oil, sprinkle with truffle zest, and then blend until creamy and smooth. You can add the truffle zest a little at a time until you have your desired flavor. We like to sprinkle this version with chopped chives for garnish, color, and flavor.


Simplest ways to use your own Ricotta Cheese
Homemade ricotta cheese is delicious with pasta or in ravioli and lasagna. But, let's go beyond! Use ricotta cheese as a cream cheese substitute in many recipes.
Here are a few examples:
- Ricotta cheese is delicious on top of toast, crackers, or bagels. Drizzling with honey adds a wonderful sweet kick.
- Sprinkle with chopped fresh herbs like chives, basil, parsley, oregano, thyme, or rosemary, and serve with crackers or crostini. (see note below)
- Top with fresh fruit, sliced strawberries, apples, pineapple wedges, or blueberries on a crostini, toast, or a bagel.
- Serve this cheese with smoked salmon and capers for a delicious breakfast or snack.
Note: When adding fresh herbs to the cheese it is best top the cheese with chopped fresh herbs and serve right away. Herbs will turn brown over time when cheese is stored with the fresh herbs.

How long can you store Homemade Ricotta
- REFRIGERATOR: Finished cheese can be stored in the refrigerator in a sealed container for up to 7 days.
- FREEZER: Cheese can be frozen for up to one year in a resealable container. Please remember to label and date your container before freezing. Thaw in the refrigerator for 5-6 hours, and then gently stir before using for best results.
What is Whey?
So, what are whey proteins?
It's the liquid remaining after the milk curds have been strained and curdled. This is the leftover liquid from the ricotta-making process and it's got a lot of uses in recipes.
Whey can be frozen for up to one year and used for future recipes. When freezing whey pour it into a freezer-safe airtight container. It's best to use a container that will represent one serving size because you can not refreeze whey once it's been thawed.
Let the liquid whey thaw for 24 hours in the refrigerator before using and gently stir it.
What are some uses for leftover Whey?
There are many uses for leftover whey including yogurt, bread, soups, and a variety of other amazing recipes.
Whey can also be used as a substitute for buttermilk in pancakes or quick breads like our buttermilk banana bread. It can also be used as a milk substitute in homemade mac and cheese, waffles, or our berry banana smoothie bowl.
What is the difference between Ricotta cheese and Cottage cheese?
Ricotta cheese is made from leftover whey while cottage cheese is made from curds. This makes cottage cheese a more dense slightly lumpy cheese while ricotta is smooth. Both cheeses are soft, but one is lumpy and one is more smooth.
Wondering which cheese is healthier? Cottage cheese has a lower fat content. However, Ricotta cheese is higher in calcium and is high in vitamins A, E, D, and B2. It is a great addition to a low-carb diet and has less carbohydrates than cottage cheese.

Here are some additional light snacks to try!
Want to Save This Recipe?
Enter your email & We'll send it to your inbox. Plus, get great new recipes from us every week!
By submitting this form, you consent to receive emails from The Art of Food and Wine.

How to make Ricotta cheese
Equipment
- Stock pot
- cheesecloth
- cheese ladle
Ingredients
- 1 gallon Whole milk
- 4 cups Heavy cream
- 1½ cups Distilled white vinegar
- ½ cup Fresh squeezed lemon juice
- 2 teaspoon Kosher salt
Instructions
- Heat the milk and cream over medium heat until it reaches 200˚F. Stir frequently to avoid sticking or burning at the bottom of the large pot.
- Mix the lemon juice and vinegar together in a small bowl and set aside.
- Once the mixture reaches 200˚F turn off the heat completely.
- Keep stirring consistently while you add in the salt and lemon juice vinegar mixture.
- Mix 1-2 times to completely combine. The cream mixture will begin to coagulate immediately. This is normal. Cover with the lid.
- Allow the cheese to rest for 10 minutes without removing the lid or stirring. This is important so DO NOT BE CURIOUS.
- While the mixture is resting it will coagulate and white curds will form and float on the surface.
- While you are waiting for the cheese to finish line a colander with a fine cheese cloth, and place the colander into a large bowl. Set to the side of the pot.
- After 10 minutes remove the lid from the pot. Gently rest your skimmer on the curds. If the skimmer does not sink all the way below the curds you are ready to scoop out the cheese.
- Scoop from the middle of the pot to the sides of the pot. Lift out the cheese and place it into the cheesecloth-lined colander.
- Scoop out as much of the curds as you can until all that is remaining is a liquid called "whey". See below for all the ways you can use the leftover whey proteins.
- Allow cheese to drain completely. This will take around 30 minutes.
- Retain any liquid whey draining from the cheese for future uses.
- Remove the cheese from the cheesecloth. Cheese can be placed in molds or shaped to your favorite shape.
- You can serve the cheese or add flavors. Cheese is now ready to add to your favorite recipes.

Dannii
So much great information. It all really helped and we made delicious ricotta cheese.
Ned
I didn't realize it was so easy to make ricotta cheese. This is WAY better than store bought too! Thank you for this!
Sonia
This is so brilliant - thanks for sharing!!! Such a fab recipe - appreciate it!
Harriet Young
Just brilliant! I had never tried making my own ricotta before and this recipe worked wonderfully
MacKenzie
This was absolutely amazing. I will never buy store-bought ricotta cheese again, thank you for such a delightful recipe.
Angela
Love how you clearly break down all the steps to make ricotta. I appreciate the tips for the leftover whey as well. Great recipe!
Gianne
This adds a creamy and savory touch to any dish. I love using it in my lasagnas and stuffed pasta shells. Its smooth texture and mild flavor make it a versatile ingredient for both sweet and savory recipes.
Jayne
Thanks Gianne, so glad you enjoyed our recipe.